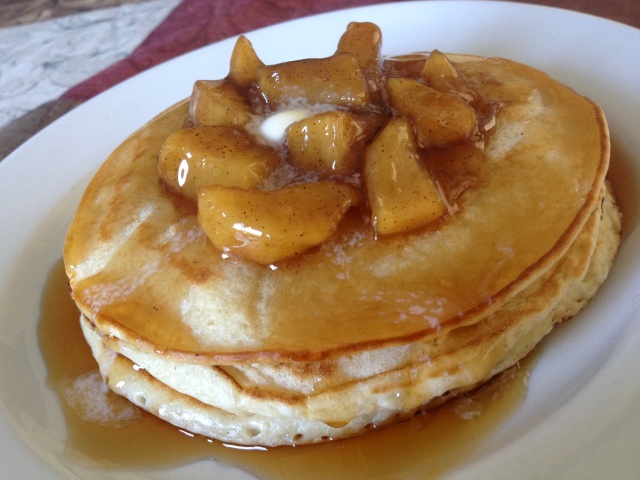
Pancakes.
Warm.
Crisp edges.
Warm Maple Syrup flowing.
Butter melting.
Is your mouth watering yet?
Top em with apples and I’m SOLD!
Comforting, satisfying and oh-so-delicious…I’ve been on a pancake craze ever since I found this new recipe that gives me the pancake goodness without the need for eggs! (Eggs are Kryptonite for my little man of steel so we keep them out of the house.)
Since I’ve managed to make these several times now without messing them up, this is my go-to recipe so I thought I’d share –
I call these “Saturday Pancakes” because
1. I usually crave them on Saturday mornings and
2. By Saturday, my groceries are practically depleted but I can usually scrounge up the ingredients for this recipe in my pantry. Not counting water, it only has only 8 ingredients, of which only 6 are really necessary.
SATURDAY PANCAKES
Ingredients:
2 C All-purpose flour
4 t Baking powder
1/2 t Salt
2 T Sugar
1/4 t Cinnamon (OPTIONAL)
1 C Water
*1 C Milk
1/2 t Vanilla Extract
**1/2 C Apple sauce
*If you don’t have milk, just stick with water so that you have a total of 2 C of water in your batter. Pancakes will come out a bit more dense though.
**I use a Motts snack cup but I’ve also chopped, boiled and blended a fresh apple with a splash of water, sugar and cinnamon for a homemade applesauce when I ran out of snack cups.)
Steps:
1. Whisk together the dry ingredients together in a large mixing bowl.
2. Add the remaining ingredients and beat together with your whisk just until the ingredients are combined. Be careful not to overmix!
3. Butter your skillet after warming it on a medium/medium-low heat and pour in batter as needed for your desired pancake size.
4. Cook the pancakes for 2 to 3 minutes per side. Flip it when the top center of the pancakes begins to bubble.
(Repeat steps 3 and 4 until your batter is finished.)
5. Enjoy!
My pancake apple topping is still being perfected so I’ll get back to you on that recipe. I will tell you this much – In a medium saucepan, I throw in two chopped apples, about a 1/2 cup of pure maple syrup, 1 Tablespoon of raw cane sugar, a dash of cinnamon, vanilla extract and a splash of water. I cook it on a low heat while I’m making my pancakes. When it’s nearly done, I throw in some cornstarch that’s been dissolved in a little bit of water to thicken the sauce and let it cook for a few more minutes. I’ll post the recipe for that at some point in the future but feel free to just take a shot at it because it’s pretty hard to mess up!


